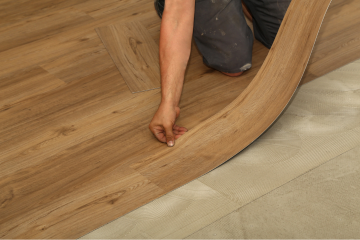
Luxury Vinyl Tile (LVT) has become a popular choice for flooring due to its durability, affordability, and ability to mimic high-end materials like hardwood, stone, or ceramic. It’s also relatively easy to install, making it a favourite among DIY enthusiasts. In this guide, we’ll walk you through the process of laying LVT step by step. The article is divided into five sections: Preparation, Tools and Materials, Subfloor Preparation, Installation, and Finishing Touches.
1. Preparation
Proper preparation is critical to the successful installation of LVT. Before getting started, take the following steps to ensure your project runs smoothly:
Measure Your Space
Begin by measuring the area where you’ll install the LVT. Calculate the total square footage/metres, and add 10–15% to account for wastage, cutting, or future repairs. Use this measurement to purchase the appropriate amount of flooring.
Choose the Right Type of LVT
LVT comes in two primary installation styles: click-lock and glue-down. Click-lock LVT snaps together without adhesive, while glue-down LVT requires adhesive applied to the subfloor. Consider your skill level, the environment (e.g., moisture levels), and your budget when choosing the type.
Acclimatise the Flooring
LVT must acclimatise to the room’s temperature and humidity. Place the unopened boxes of flooring in the room for 48 hours before installation. This reduces the risk of buckling or gapping after installation.
2. Tools and Materials
Having the right tools and materials ensures a smooth installation process. Gather these items before you start:
Essential Tools
- Utility knife (with extra blades)
- Tape measure
- Straight edge or spirit level
- Pencil
- Rubber mallet
- Spacers
- Tapping block
- Roller (for glue-down installations)
- Notched trowel (for adhesive application)
Additional Materials
- Laminate style Underlay (if required for your LVT type)
- Adhesive (for glue-down LVT)
- Cleaning cloths and floor cleaner
- PPE (e.g., gloves and knee pads)
Ensure all tools are in good condition, and always follow manufacturer guidelines for adhesive or underlay.
3. Subfloor Preparation
A properly prepared subfloor is essential for a flawless finish. Whether your base is concrete, wood, or an existing floor, follow these steps:
Check for Levelness
Use a straight edge or spirit level to check the subfloor for uneven spots. Any deviations greater than 3mm over a 2m span must be addressed. Uneven floors can cause the LVT to shift or crack over time.
- For concrete floors: Use a self-levelling compound to fill low areas.
- For wooden floors: Sand down high points and repair loose or damaged boards.
Clean Thoroughly
Dust, dirt, and debris can interfere with adhesive bonding or cause gaps in click-lock systems. Sweep, vacuum, and, if necessary, mop the subfloor. Ensure it is completely dry before proceeding.
Install Underlay (If Required)
Some LVT types require an underlay, particularly click-lock systems. This layer provides soundproofing, insulation, and additional cushioning. Follow the manufacturer’s recommendations to ensure compatibility.
4. Installation
Once your tools are ready and the subfloor is prepared, you can begin laying your LVT. This section outlines the installation process for both click-lock and glue-down systems.
Step 1: Plan the Layout
Plan your installation to avoid thin strips of tiles at the edges. Dry lay a row to determine the optimal starting point. Use spacers to maintain an expansion gap (typically 5–10mm) around the room’s perimeter to accommodate temperature changes.
Step 2: Cutting LVT
Measure and mark tiles where cuts are necessary. Use a utility knife and a straight edge to score the surface, then snap the tile along the scored line. For intricate cuts, use a jigsaw or handsaw with a fine-tooth blade.
Step 3: Installing Click-Lock LVT
- Begin in a corner, placing the first tile with the tongue side facing the wall.
- Click the next tile into place by angling it into the groove of the first tile and pressing down gently. Use a rubber mallet or tapping block if necessary.
- Continue installing row by row, staggering the joints by at least 15–20cm for a natural look.
Step 4: Installing Glue-Down LVT
- Apply adhesive to a small section of the subfloor using a notched trowel. Work in manageable areas to prevent the adhesive from drying before placement.
- Place the tile onto the adhesive, pressing firmly. Use a roller to eliminate air bubbles and ensure strong adhesion.
- Repeat, ensuring tiles are tightly aligned. Wipe away excess adhesive immediately.
5. Finishing Touches
The final step is to complete the project with attention to detail, ensuring the floor is ready for use.
Secure the Edges
Remove spacers and install skirting boards or trim to cover the expansion gap. Be careful not to pin the LVT to the floor, as it needs space to expand and contract.
Inspect and Clean
Check the entire floor for gaps, misaligned tiles, or adhesive residue. Use a damp cloth to clean the surface. Avoid excessive water, especially on glue-down installations, as this can weaken the adhesive.
Allow for Settling
For glue-down systems, avoid heavy traffic for 24–48 hours to allow the adhesive to cure properly. For click-lock systems, you can usually use the floor immediately, but check the manufacturer’s instructions.
Maintain Your LVT
To keep your floor looking its best, follow a regular maintenance routine:
- Sweep or vacuum frequently to remove debris.
- Use a damp mop and pH-neutral cleaner for deeper cleaning.
- Place protective pads under furniture to prevent scratches.
Final Thoughts
Laying LVT is a rewarding project that combines durability and elegance with cost-effectiveness. By carefully preparing, using the right tools, and following the correct installation steps, you can achieve professional results, even as a DIY enthusiast. Whether you opt for the convenience of click-lock tiles or the secure fit of glue-down flooring, this guide ensures you’re equipped to tackle the job with confidence.


