
Herringbone flooring has become an increasingly popular choice for homeowners looking to add elegance and sophistication to their interiors. Its distinctive V-shaped pattern creates visual interest and adds a timeless charm that suits both traditional and contemporary spaces. Installing herringbone flooring, however, requires precision and careful planning to achieve a professional finish. This guide will take you through the history of herringbone flooring, whether underlay is needed, and a step-by-step installation process, along with essential precautions to ensure a flawless result.
A Brief History of Herringbone Flooring
The herringbone pattern dates back to the Roman Empire when it was first used in road construction. The Romans realised that arranging bricks in an interlocking V-shaped pattern made roads more durable and resistant to shifting forces. This same principle was later applied to wooden flooring, making herringbone one of the oldest and most enduring flooring designs.
Herringbone parquet flooring became highly popular in 16th-century France, where it was used in grand estates and palaces. By the 18th and 19th centuries, it had spread across Europe, symbolising luxury and craftsmanship. Today, it remains a favourite in interior design, bringing a classic yet modern appeal to home
Do You Need Underlay for Herringbone Flooring?
Whether or not underlay is required depends on the type of flooring you are installing and the subfloor condition. Here’s what you need to consider:
1. Engineered Wood Herringbone Flooring
- Typically installed using a glue-down method directly onto a prepared subfloor.
- Underlay is generally not needed, but a moisture barrier may be required when installing over concrete.
- Offers stability and reduces movement compared to floating floors.
2. Solid Wood Herringbone Flooring
- Always glued down to prevent excessive movement.
- No underlay is used, but a moisture barrier may be required if installing over a damp-prone subfloor.
3. Laminate and Vinyl Herringbone Flooring
- Usually installed as a floating floor, meaning underlay is necessary.
- Underlay provides cushioning, sound reduction, and additional insulation.
- If installing over concrete, choose an underlay with a built-in damp-proof membrane.
In summary, underlay is typically required for floating floors such as laminate and vinyl, while solid and engineered wood herringbone floors are glued directly to the subfloor.
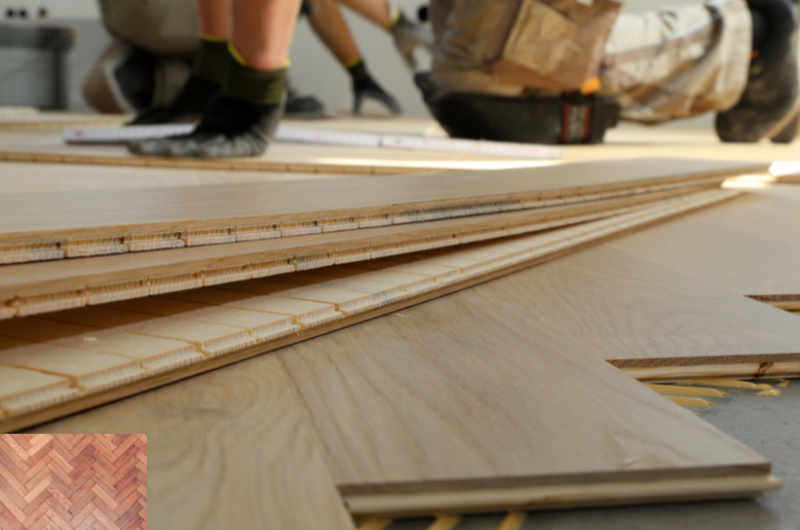
Step-by-Step Guide to Installing Herringbone Flooring
Installing herringbone flooring takes careful preparation. Follow these steps to achieve the best results:
1. Prepare the Subfloor
- Ensure the subfloor is dry, level, and clean. Any unevenness greater than 3mm over a 1m span should be corrected with levelling compound (for concrete) or plywood (for wooden subfloors).
- If installing over concrete, check for moisture and apply a damp-proof membrane if necessary.
2. Acclimatise the Flooring
- Leave the herringbone flooring in the installation room for at least 48 hours to adjust to temperature and humidity levels, reducing the risk of expansion or contraction.
3. Plan Your Layout
- Find the centre of the room and draw a reference line. This will be your guide to ensure the pattern remains symmetrical.
- Consider how the pattern aligns with the walls and doorways to create a balanced visual effect.
4. Dry Lay the First Few Rows
- Before applying adhesive, place a few rows of planks in the pattern to check alignment and appearance.
- Adjust as necessary to ensure the layout is symmetrical and pleasing to the eye.
5. Apply Adhesive
- Use a notched trowel to spread a high-quality wood flooring adhesive over a small section of the subfloor.
- Work in small areas to prevent the adhesive from drying before the flooring is placed.
6. Install the Flooring
- Start laying the planks along the reference line, pressing them firmly into the adhesive.
- Regularly check alignment and use spacers around the edges to maintain a 10mm expansion gap.
- Continue installing in sections, keeping the pattern consistent.
7. Cutting and Fitting Edge Pieces
- Use a mitre saw or jigsaw to cut planks to fit against walls and edges.
- Ensure cuts are precise to maintain a seamless pattern.
8. Allow the Adhesive to Cure
- Avoid walking on the floor for at least 24 hours to let the adhesive fully bond.
9. Install Skirting Boards or Beading
- Once the floor is set, install skirting boards or beading to cover the expansion gap.
- If you removed existing skirting, reinstall or replace it for a clean finish.
Essential Precautions and Tips
1. Maintain Consistent Room Conditions
- Keep the room’s temperature between 15-23°C and humidity between 30-60% to prevent warping or gaps in the flooring.
2. Use the Right Adhesive
- Ensure the adhesive is suitable for your flooring type and subfloor. For underfloor heating, use an adhesive designed to withstand temperature changes.
3. Don’t Forget the Expansion Gap
- Always leave a 10mm gap around the perimeter to allow for natural expansion and contraction of the wood.
4. Regularly Check Alignment
- Small misalignments can become more noticeable as you progress, so use reference points and measuring tools to maintain accuracy.
5. Choose the Right Direction
- The direction of the herringbone pattern can affect the perception of space. Running the pattern parallel to the longest wall often makes the room appear larger.
6. Consider Underfloor Heating Compatibility
- If installing over underfloor heating, choose engineered wood or laminate herringbone flooring that is heat-resistant and follow manufacturer guidelines.
Final Thoughts
Laying herringbone flooring is a challenging but rewarding task that can transform the look of your home. By carefully preparing your subfloor, choosing the right underlay where necessary, and following a precise installation method, you can achieve a stunning and durable floor. Whether opting for solid wood, engineered, laminate, or vinyl, herringbone flooring adds a touch of timeless elegance that enhances any interior space.
For those who are not confident in undertaking the installation themselves, hiring a professional can ensure a flawless finish. However, with patience, the right tools, and careful attention to detail, DIY enthusiasts can achieve professional results. Happy flooring!